How do you take information from your SharePoint list and display it in a pivot table on a SharePoint page? This can be achieved by using Excel’s Data Connections and Excel Services. This article will walk through the steps of going from a SharePoint list to an Excel Pivot Table and then to displaying the pivot table on a SharePoint page. 
Export the list to a pivot table


Publish to Excel Services
 When you’re ready to publish your table, select the windows button > Publish > Excel Services. When you’re ready to publish your table, select the windows button > Publish > Excel Services. |
 Select the SharePoint document library you’d like to publish to. If you need to add a network place, use the “new folder” button to launch the wizard. |
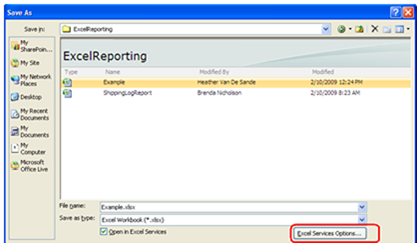 Open “Excel Services Options…” Open “Excel Services Options…” |
 Select “Items in the Workbook” from the Show selection dropdown. Select “Items in the Workbook” from the Show selection dropdown. |
 Select the pivot table created and click “OK”. After naming the file, click “Save”. This will publish the workbook to SharePoint and Excel Services. |
Excel Services will open with a preview of the report created. Close the tab when you’ve finished reviewing the output. |
Create the Web Part Page
 Back on the SharePoint site, create a new page. Back on the SharePoint site, create a new page. |
 Enter in a Title, the URL Name (without spaces, using CamelCase), and “Blank Web Part Page” for the layout. Create. |
 Add a web part Add a web part |
 Add an Excel Web Access web part. Add an Excel Web Access web part. |
 In the web part, you’ll see “Click here to open the tool pane.” Inside the tool pane, the ellipsis next to the Workbook will open a browse menu to libraries/lists in the site. Locate the document library the workbook was published to. You may need to use the paging option at the top to retrieve the next set of options. |
 Select the workbook that was published earlier. Alternatively, if you have the URL, you can just enter that into the Workbook field. |
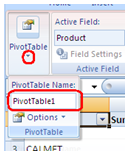
 In the Named Item, enter the name of the pivot table (exactly as it was named earlier in the workbook.) Click “Apply”. Click “Save and Stop Editing” to view the page normally. |
 The page will be saved into the “Pages” document library, a library that is common to all SharePoint sites. Copy the URL to add to a link list. |
| This link can then be added to another page more accessible to others. |
Refreshing the list
When the originating SharePoint list has changed, for example new items have been added to the list, the excel pivot table will need to be opened and refreshed. (Instructions on having the data refresh automatically will be added in another post.)
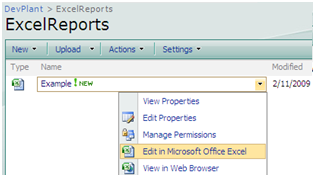 Open the document library housing the spreadsheet, and “Edit in Microsoft Office Excel.” Open the document library housing the spreadsheet, and “Edit in Microsoft Office Excel.” |
On the “Data” tab, select “Connection” and “Refresh”, then “Close”. You should see the new totals reflected on the pivot table in the workbook. Click “Save”. Since the workbook was opened from SharePoint it will save back to SharePoint. You do not need to republish it. Close the workbook and refresh the page with the web part to view new data. |
No comments:
Post a Comment